![Logo-gamfi_orange.png]](https://gamfi.support/hs-fs/hubfs/Logo-gamfi_orange.png?height=40&name=Logo-gamfi_orange.png)

What does the Gamfi Knowledge Base offer?
➕ adding documents,
🔄 replacing files without losing links,
📁 organizing materials in catalogs,
🔎 searching and filtering documents,
🎯 management of material availability.

📚 How do I add a document to the Knowledge Base?
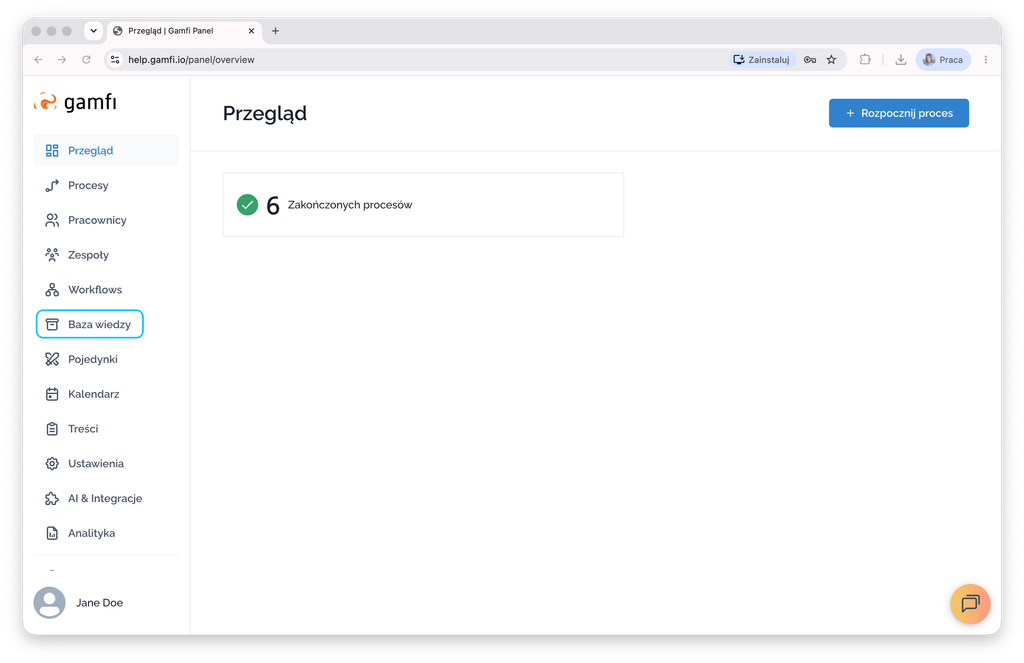
Go to the "Knowledge Base" tab in the side menu and select the "Add document" action. Choose the document and click the "Next" button.
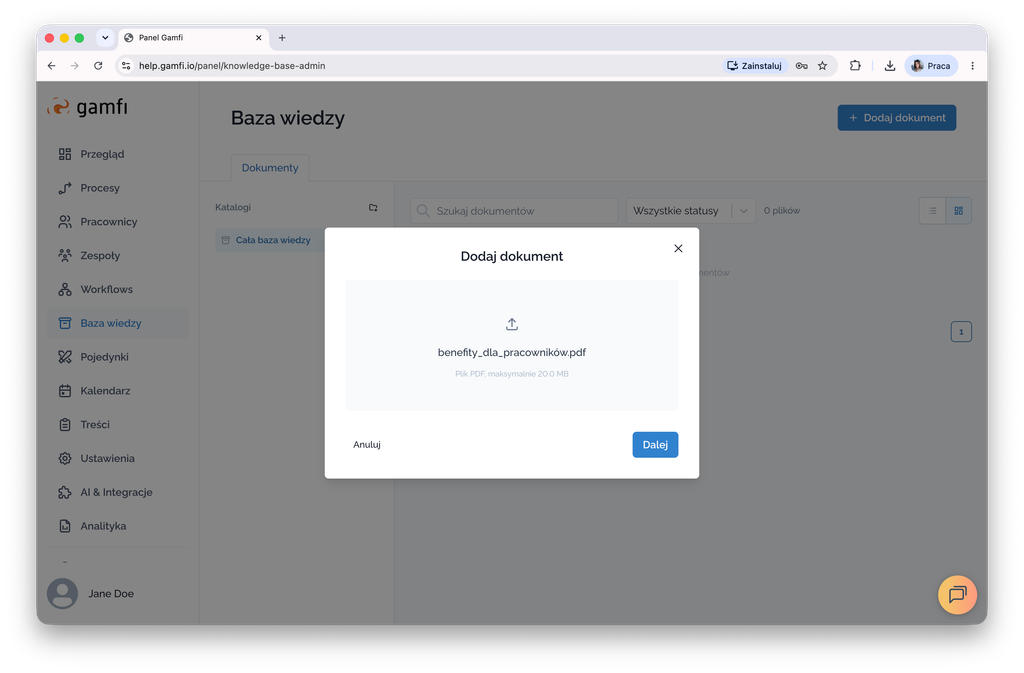
⚠️ Please note that currently, only documents in PDF format can be added to the Knowledge Base.
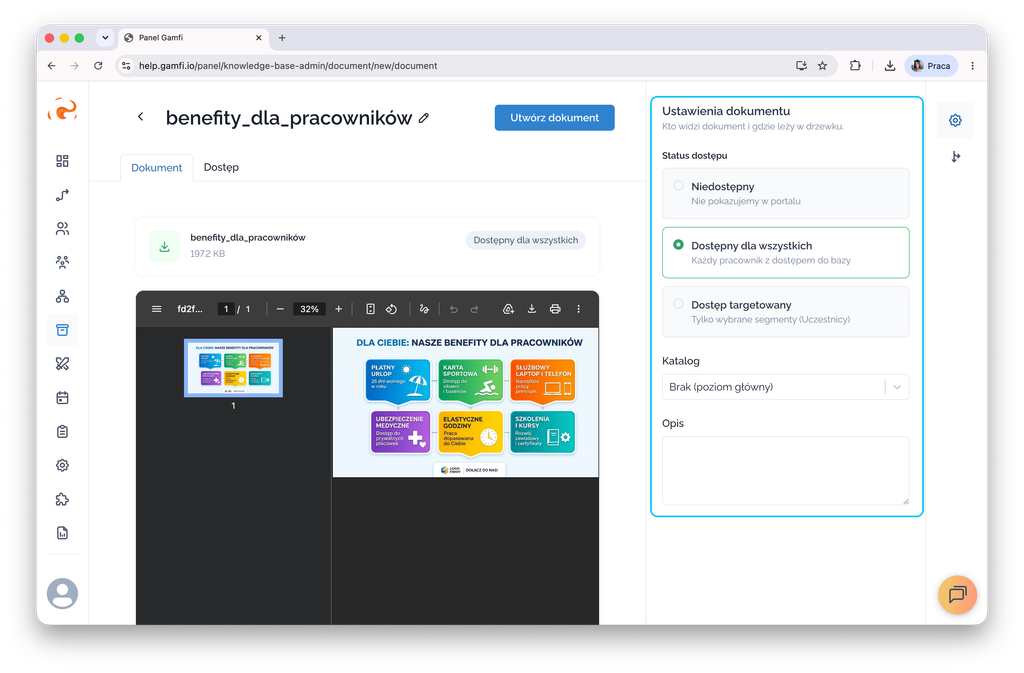
It is time to define the document settings.
During the creation stage, a document can have one of three statuses:
-
Available to all – immediately visible to all users,
-
Targeted access – available only to specific groups,
-
Unavailable – hidden from users.
A fourth state—Archived—cannot be selected during creation. A document can only be archived after it has been saved (see below).
Here, you can also immediately assign the document to a selected folder—provided it has already been created*—and add a description.
* You will learn how to create a folder later in the article.
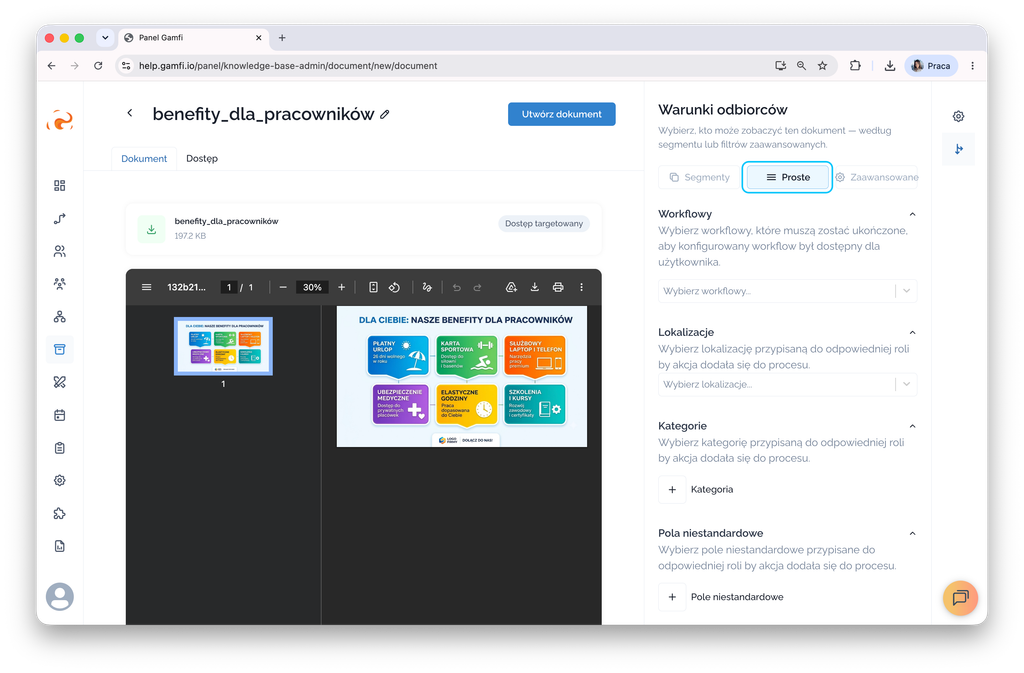
If you select “Targeted access,” you have three options for adding conditions:
1️⃣ Simple – a document can be visible to an employee when:
- completes the specified workflow,
- is assigned to the selected location,
- is assigned to the selected category,
- meets the condition defined by the selected custom field.
2️⃣ Advanced – this type of targeting allows you to combine multiple conditions, as shown in the example below.
|
💡Example: |
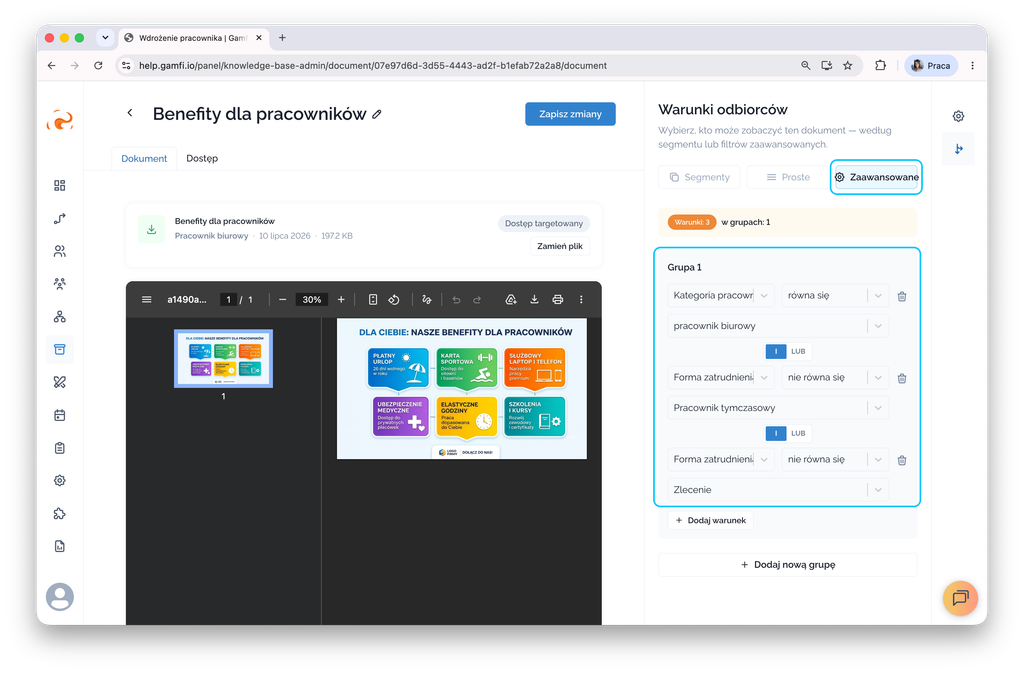
☝🏻 Note that you can:
⚪️ combine conditions using the “and” and “or” operators
⚪️ define specific conditions using the following operators:
- “equals”
- “does not equal”
- “contains”
- “is empty”
- “is not empty”
⚪️ create additional groups of conditions and combine them using the “and” and “or” operators.
This allows you to tailor access to any situation.
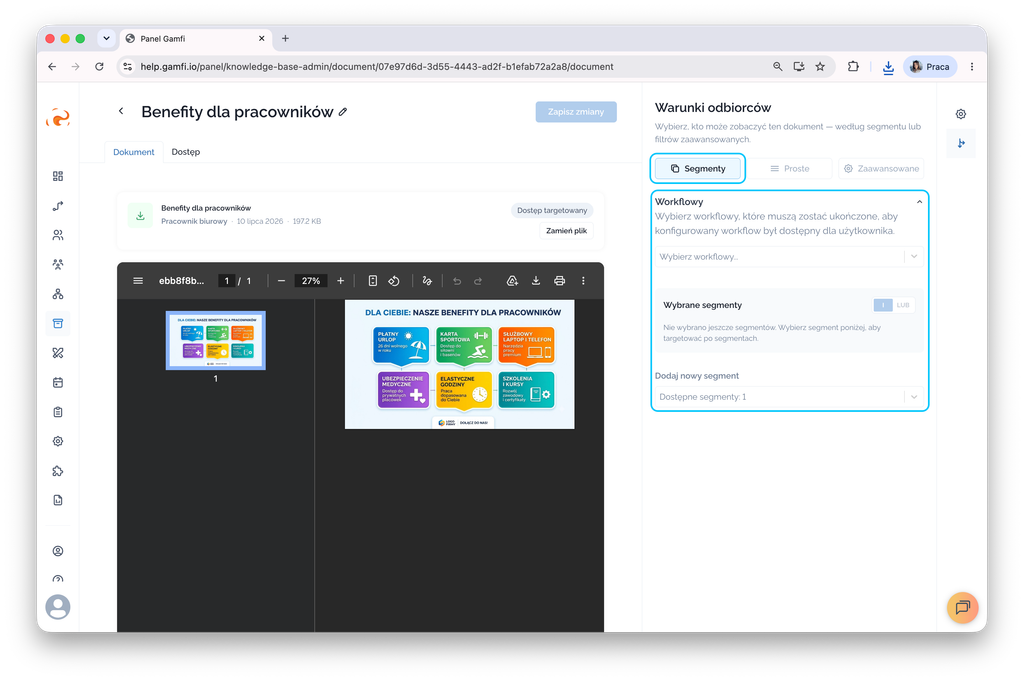
3️⃣ Segments – this type of targeting allows you to combine a completed workflow condition with a selected Segment*.
* You can read more about Segments in the User Management module.

Once you save the changes, the document is added to the Knowledge Base according to the selected status:
- Available to all or Targeted access – visible to everyone or only to those meeting specific criteria, respectively,
- Unavailable – saved but hidden from users.
After saving, two new options will appear on the screen:
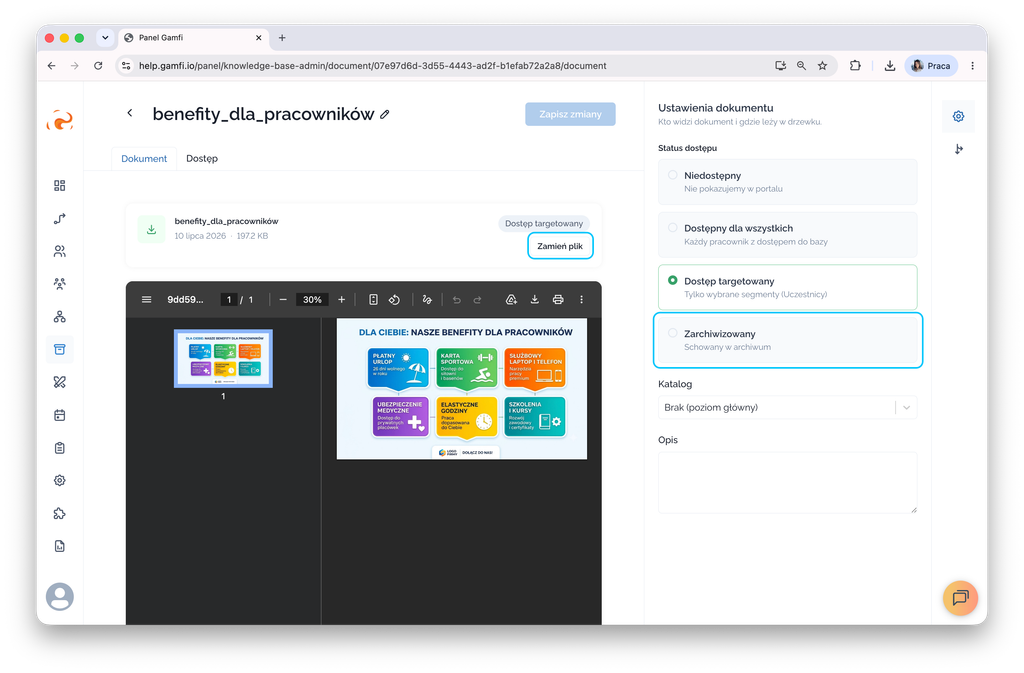
- an additional access status—"Archived"—will appear in the Document Settings (on the right side of the screen), allowing you to move the document to the archive,
- an option to replace the file (without losing links*) will appear in the center of the screen.
* If the document was previously published and you now replace the file, the document will continue to work in the Knowledge Base and in any actions where it was linked.
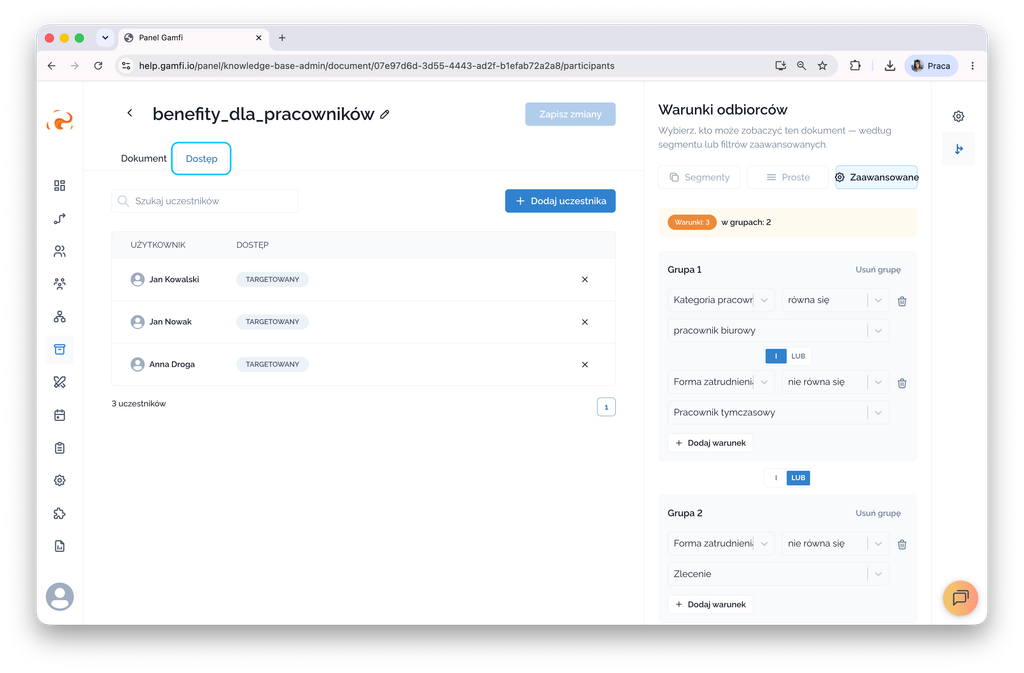
Upon entering the “Access” tab, you will immediately see a list of individuals who currently meet the criteria of the defined conditions.
✍🏻 How do I link a Knowledge Base document to a workflow action?
Knowledge Base materials can be attached to any task in two ways:
1️⃣ From the "Knowledge Base" tab 📖
- see the settings menu for the specific action on the right side of the screen.
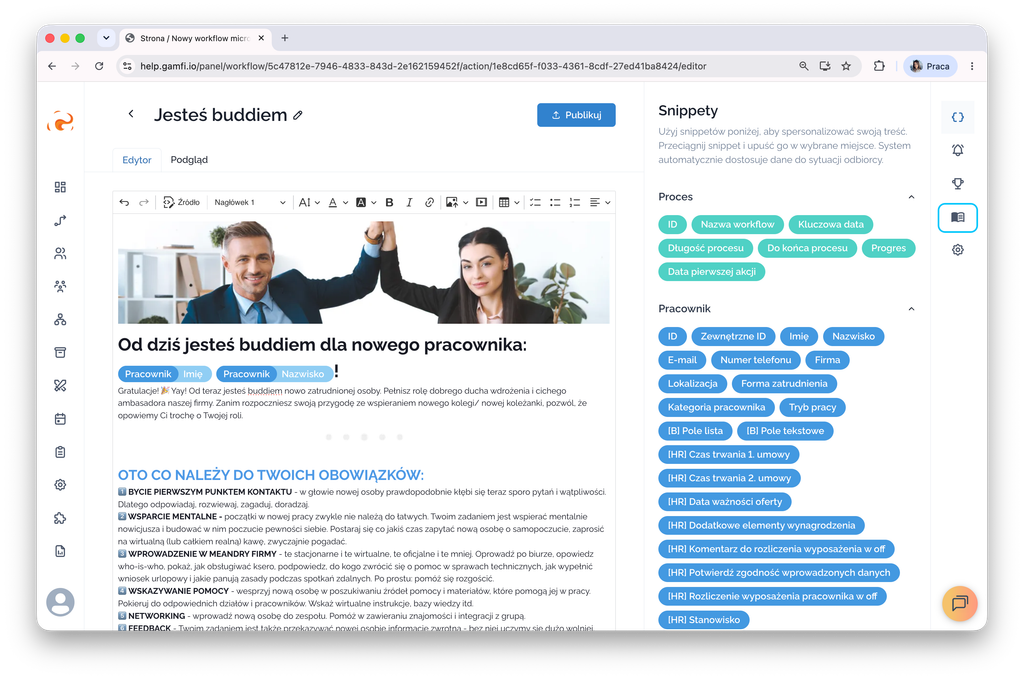
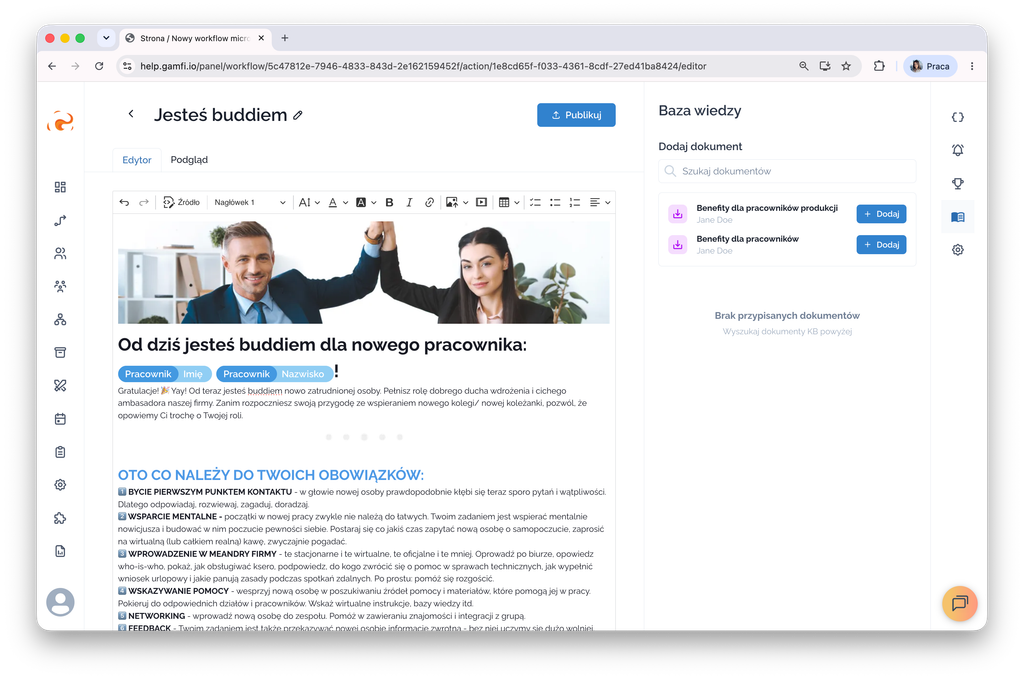
Upon entering the tab, a list of materials from the Knowledge Base repository will appear on the right side of the screen. If there are many materials, you can use the search function (the field with the magnifying glass icon labeled "Search documents") and, after finding the desired item, select the document using the "+Add" button.
2️⃣ Using the tagging and snippet selection features in the editor 🏷️
- type "@" in the text field and select the document (or snippet*) you want to add to the task.
* Snippet – an element that allows employee profile data to be pulled into the content of an action.
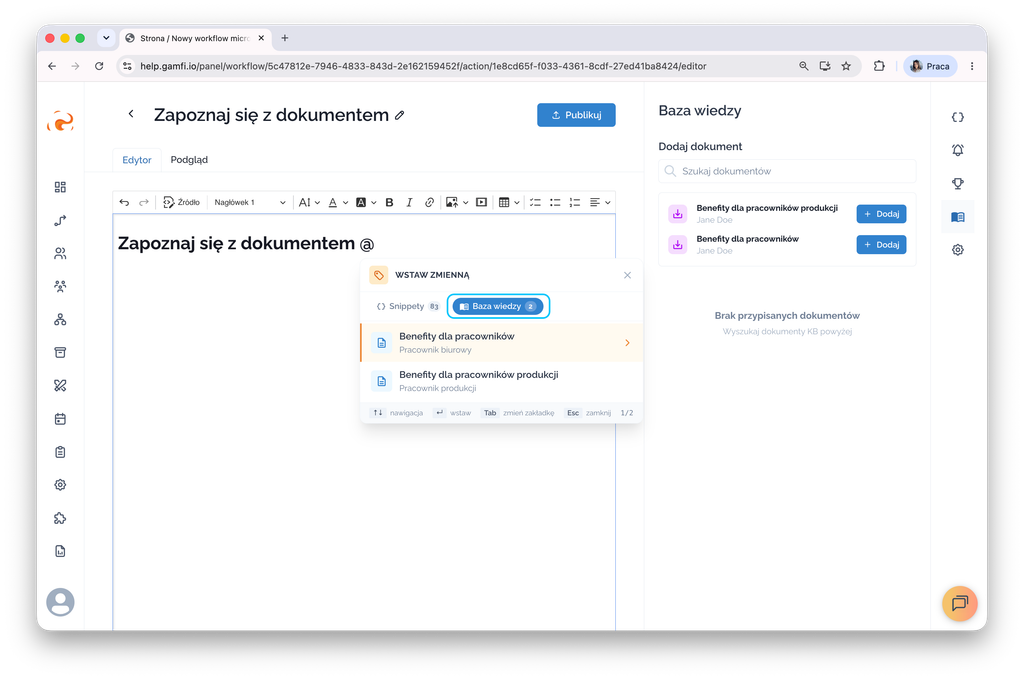
This way, you can insert both existing snippets and documents from the Knowledge Base repository directly into the content.
☝🏻 Keep in mind that…
If a document:
- was not previously available to the user,
- or the user was not part of the target group,
then the moment the document is attached to an action and that action is made available to the user, the document automatically becomes accessible to them.
From that point on, it will also appear in their Knowledge Base. This allows you to build a library of materials that grows naturally as users progress through processes, without the need to manually grant access to each individual document.