In this article you will learn:
- What can you use the Form for?
- How to prepare the Form to be filled in by the user in the Process?
- What are Custom Fields used in a Form and how to configure them?
- Where to check the data completed in the Form?
- How to transfer data from a Form to others?
- How to transfer data from a Form to other systems?
- How does the User complete the Form in the User Portal?
You can use the "Form" action for things like:
- collecting information, e.g., HR information
- pulse-check research (survey):
Pulse checks can be used to assess, among other things:
- employee well
-being before the first day of work,
- welcome day assessment,
- availability of the supervisor and buddy during the first week of work,
- the extent of support from the supervisor and team,
- verification of understanding of the job scope,
- assessment of the quality of materials received during the onboarding process,
- consistency of the employee experience from the recruitment stage to onboarding.
✨ We recommend conducting several different pulse checks at different stages of the onboarding process, for example, in the week before starting work, after the first week of work, and after the first month of work.
- choice of welcome pack or IT equipment.
How do I prepare a Form to be filled in by a user in a Process?

You can find the Form action in the Workflow builder in the “Add new” section - as with other Actions, just drag it to the appropriate place in the Workflow and then configure its settings.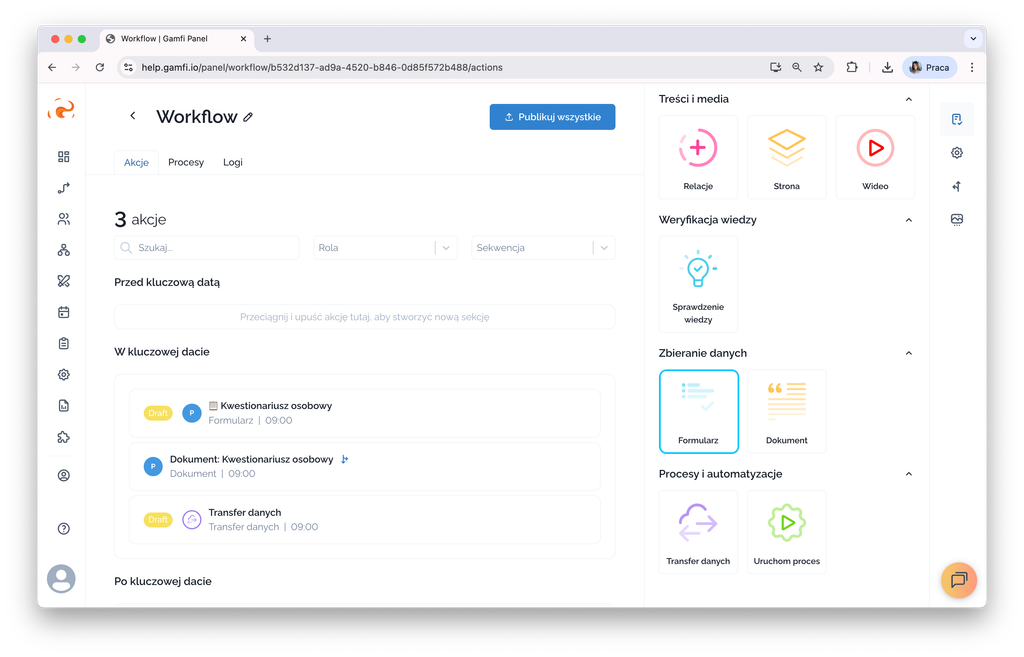
Step 1: Configure Settings
As with other Actions, in the Settings tab you can name the form, indicate the recipient of this Action, the time of delivery and the deadline for execution. Remember that you can also use Conditions: set conditions for attaching an Action to a Process based on the Category and/or Location of the user, or resulting from the completion of another Action.
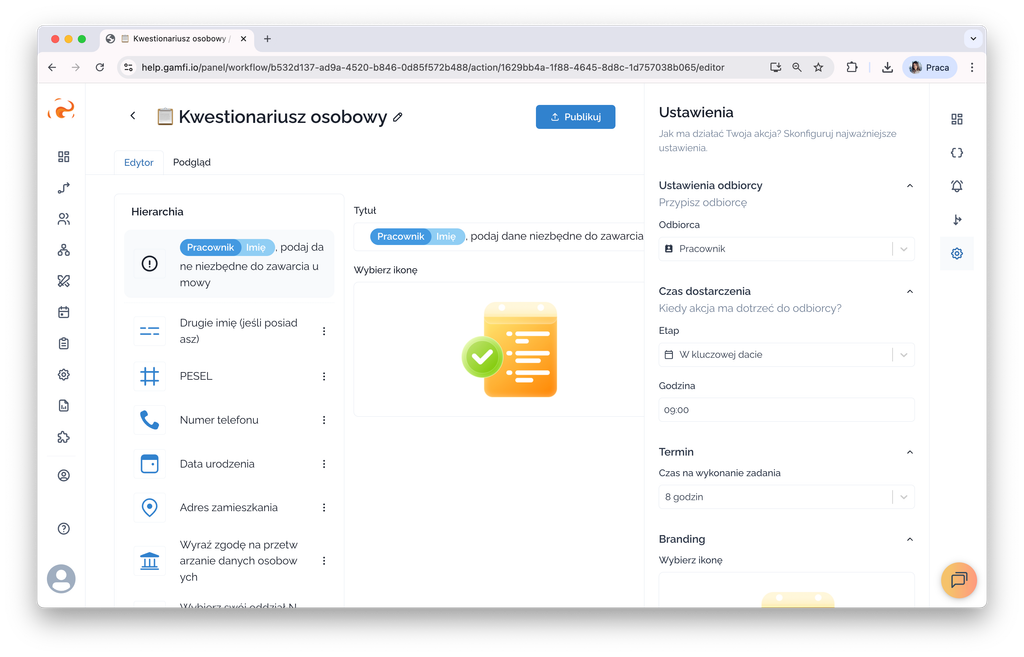
Step 2: Prepare the Form's start page
The start page is a permanent element of every Form. You can enter a short text informing, for example, about the scope of the data collected or the purpose, and choose one of the icons prepared by Gamfi to match the character of the form.
Step 3: Develop the structure and edit the content.
You create the structure of the Form based on the Custom Fields. Use the appropriate field types to build the form. Drag the selected field into a section with a hierarchy to add another element to the form.
You can choose between Fields:
- Text, in which the User enters the answer in text form.
- Number, in which the User enters the answer in numerical form.
- Email, in which the User can enter an email address that will be updated in the settings for their account.
- Phone number, in which the User can indicate the address of a phone number that will be updated in the settings relating to their account.
- Date, in which the User can indicate the date in one of the following formats:
date as a single day: in DD-MM-YYYY, MM-YYYY or YYYY format
date as a range: in the format DD-MM-YYYY to DD-MM-YYYY, MM-YYYY to MM-YYYY or YYYY to YYYY - Address, where the User can enter an address and, once entered, all fields will be automatically broken down and completed by street, house number, flat number, postal code, city, etc.
- Confirm, where the User can confirm that an action has been performed, or that they have read or accepted the documents/clauses indicated.
- Select, in which the User can select one or more predefined responses (you can prepare a maximum of 10 options to choose from).
- Dropdown, in which the User can select from a drop-down list one or more predefined responses (you can prepare more than 10 options to choose from).
- File, in which the User can add a file in .pdf, .jpg or .png format.
- Category - allows you to add a tag/category to an employee's profile. The category must be previously created in the Settings tab (the left-hand menu in Gamfi).
You can drag each of these fields into the Form in the same way as you do when adding Actions to Workflow (on a drag&drop basis). These fields are treated as separate questions asked to the User and create new tabs in the Form.
In each of the fields you have some fixed elements to complete:
- you must pose a Question, and you may include a short Description
- you can specify whether an answer to the question is required
- you must indicate on whose profile the given answer is to be saved (whether the User answers the question on their own behalf, e.g. the Form goes to the Employee and is to be saved on the Employee's account, or whether the User answers the question on another User, e.g. the Form is filled in by the Manager, but the answer is assigned to the Employee's account)
- you must select the Custom Field in which the answer is to be recorded in the User's profile. Read more about Custom Fields below.
For Fields of type Email and Phone Number, you do not need to indicate a Custom Field - this data will always be saved in the primary fields in the User account.
In the case of Confirm Type Fields, you can either edit the responses yourself or leave e.g. acceptance only, by activating the ‘Disable rejection option’ function in addition.
In the case of fields of type Select and Dropdown, you can edit the answers yourself, which the User can indicate, and additionally indicate whether the User can select more than one answer.
Step 4: Prepare a summary
The summary is also a fixed part of each Form. You can prepare a short thank-you note for filling it in and adapt an appropriate icon.
Step 5: Publish the Form
A Form, like any Action created in Workflow, is automatically given a ‘Draft’ status. Remember to publish it - only then will it be included in Processes.
And done! The Form will be included in ongoing Processes where it is a Future Action (if you are modifying an existing workflow) or it will appear in all newly launched Processes.
What are and how do I configure the Custom Fields used in the Form?
Custom fields are nothing more than fields where the answers given in the Form will appear. In each User's profile, you will find the section ‘Custom Fields’ and there the answers given in the Process will appear. 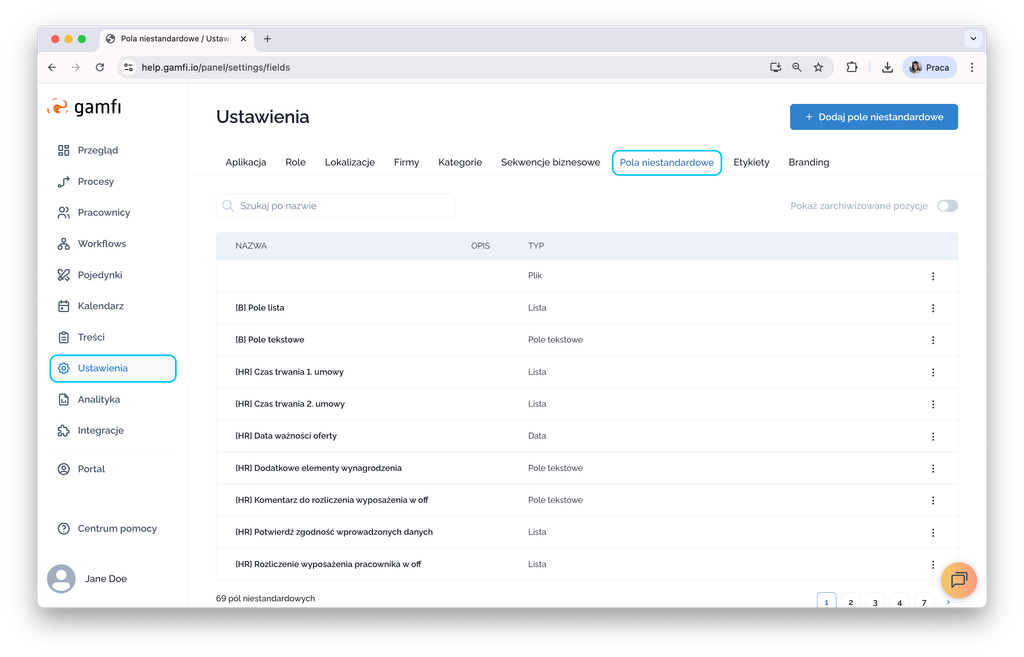
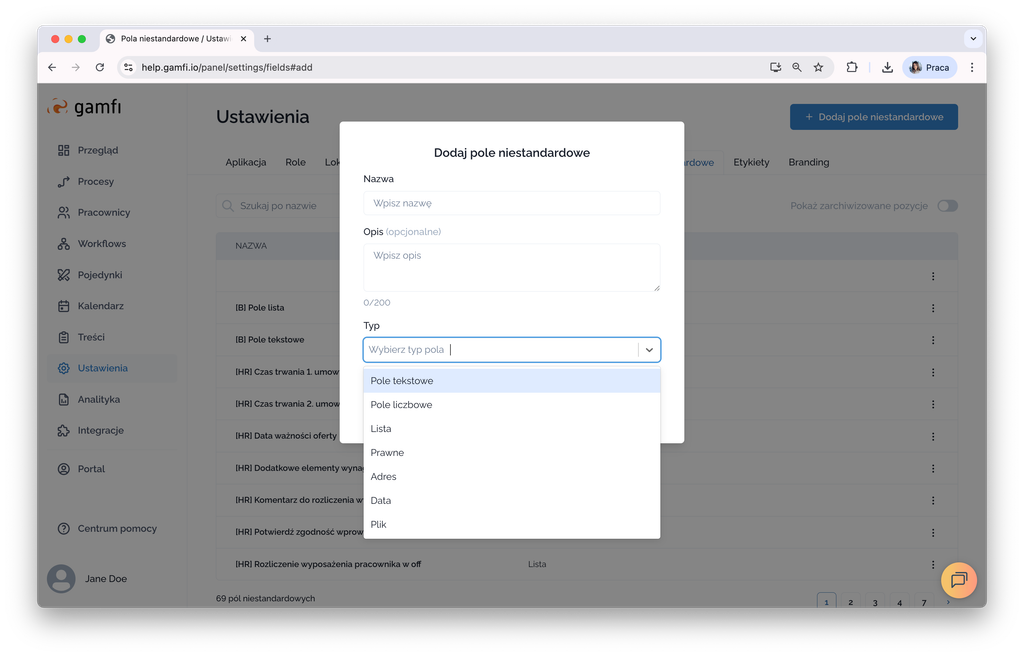
Decide for yourself which Custom Fields you wish to create. Go to the Settings tab, select the ‘Custom Fields’ tab and click on the ‘Add Custom Field’ option in the top right corner. Indicate the name and a brief description of the field. Also select what type you want it to be - match the type to the type of field you will place in the Form. If you want the User to be able to:
- give a text answer - select Text field,
- give a numerical answer - select Numerical field
- give your answer by selecting an option from a list or a drop-down list - select List
- to make a confirmation - select the right
- indicate address - select Address
- indicate a date or a date range - select Date
- send file - choose File.
Finally, you can select the “Use as snippet” switch - then the field will appear in the Snippets list and can be used in email, text message or other tasks.
⚠️ Please note that the use of Email or Phone Number fields in the form does not require the creation of new Custom Fields - the data indicated in the Form will be saved in the basic settings in the User's account.
How to delete a custom field that has been created?
A Custom Field created in the Settings section cannot be permanently deleted, but it can be archived. Simply click the three dots on the right in the list of Custom Fields next to the Field selected for archiving and select the ‘Archive’ option.
By switching on the ‘Show archived items’ switch, you can view the Custom Fields that have been archived and even restore them again by clicking on the three dots on the right and selecting the ‘Restore’ option. In this way, you can include the restored Custom Fields in your workflows again.
What is the effect of archiving Custom Fields?
- in the case of ongoing Processes, nothing changes - the archived Custom Fields continue to appear in ongoing Processes - the User can fill them in, and the data will be saved to their account.
- in case of newly started Processes, also archived Custom Fields still appear, if they have not been changed in Action in Workflow
- existing Forms, in which an archived Custom Field is indicated, remain unchanged
- archived Custom Fields cannot be used in a newly created Action or when editing an Action.
Where can I check the data completed in the Form?
All data provided by Users in Forms is saved in their accounts. Simply find the User in the Employees tab and go to the "Custom Fields" tab. All responses provided by the User or those completed on their behalf by other Users (e.g., Manager or HR) will automatically appear there.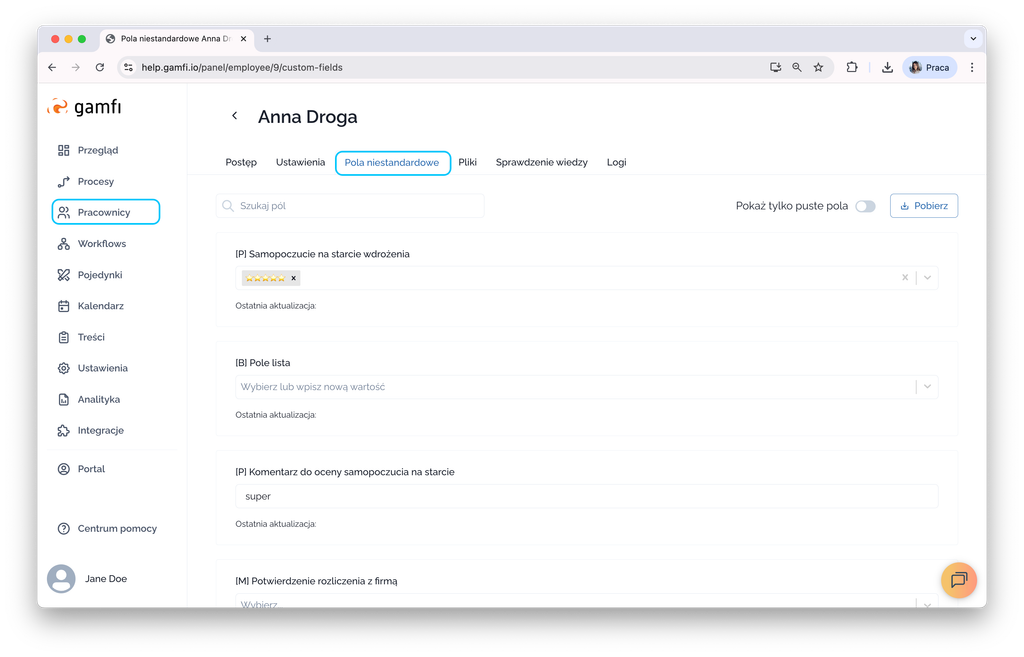
How do I transfer the data from the form to other people?
If you have indicated in the Settings when creating or editing a Custom Field that it can be used as a Snippet, and it is very easy to pass the completed information in an email or text message, scheduled as an Action in Workflow, to go to the indicated Recipient - e.g. another Role.
💡 Example:
A Personnel Form has been prepared in Workflow, where the Employee is to complete the necessary data for contract preparation. Upon completion of this task, the data will be saved in his/her profile and will additionally be emailed to the HR department in the form of Snippets.
How do I transfer data from a form to other systems?
To transfer data from forms (but also not only) to external systems, the ‘Data transfer’ action is used, which you can drag into the workflow when creating or modifying it.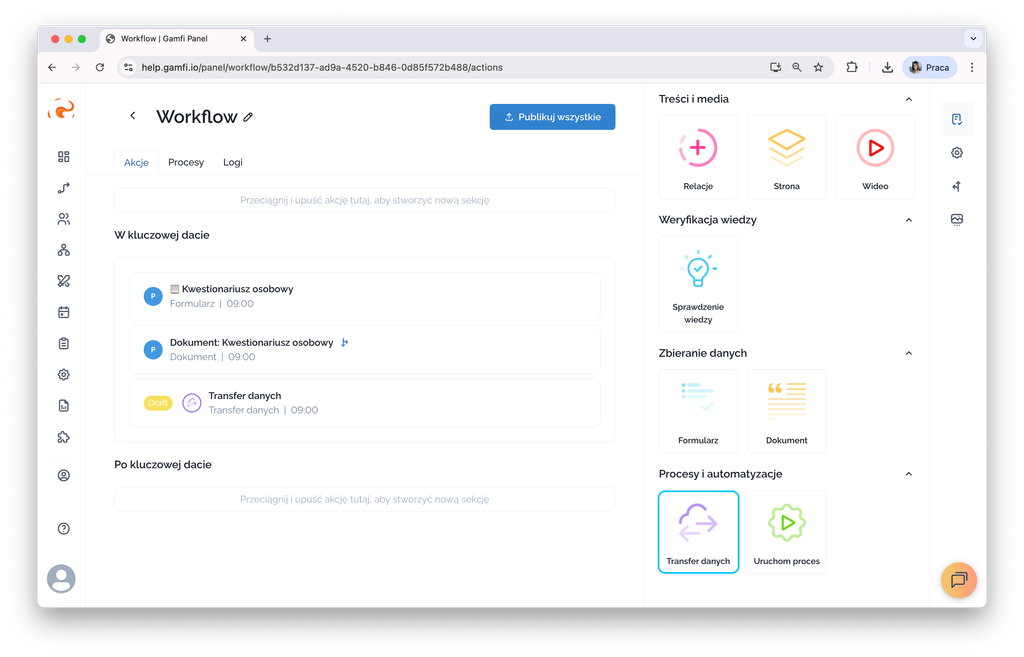
When configuring the ‘Data transfer’ action, it is important to indicate the URL to which the data is to be sent. The external system must have support for receiving webhooks. For testing, you can use the solution https://webhook.site.
After indicating the URL, it is necessary to indicate what data is to be sent by selecting the appropriate values from the list or by dragging Snippets.
When the action is executed and the action is sent, the URL will receive the data as:
{
  "Employee forename": "Jan",
  "Employee surname": "Kowalski",
  "Key day": "13.06.2024",
  "Category": "Departament"
}
How does the User complete the Form in the User Portal?
Just like any Action, the Form planned in Workflow, once the Process is launched at the appropriate moment, is made available to the User in the list of tasks in their Portal. The User fills in the Form by going through the successive slides, with the assumption that:
- he/she cannot skip mandatory questions,
- the data entered in the Form will not be saved until the whole Form is completed (the User may not complete it in several attempts).