➡️ “Talent & Onboarding” CATEGORY
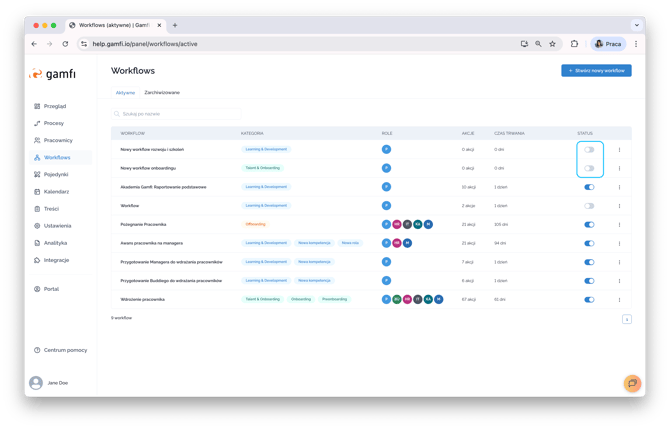
- Go to the “Workflows” tab,
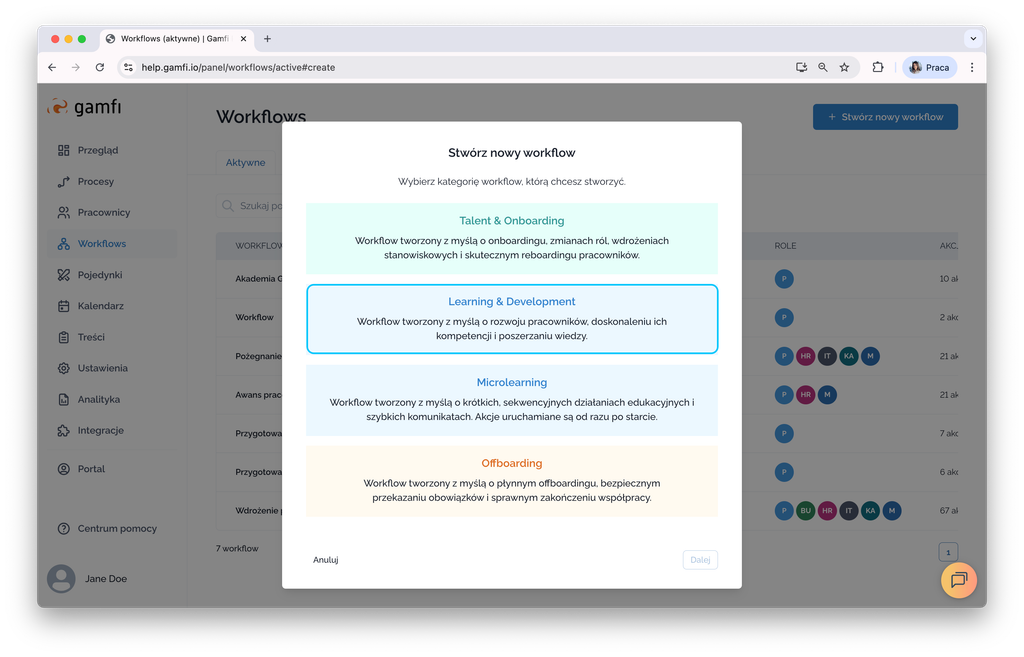
- click the “Create a new Workflow” button in the upper right corner of the screen,
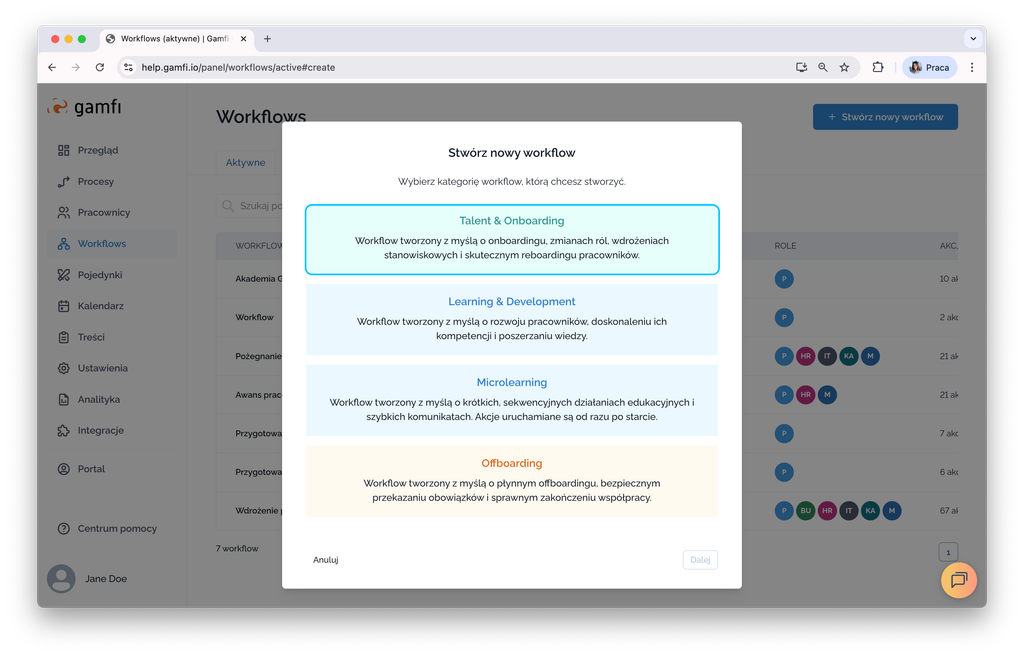
- select a workflow category:
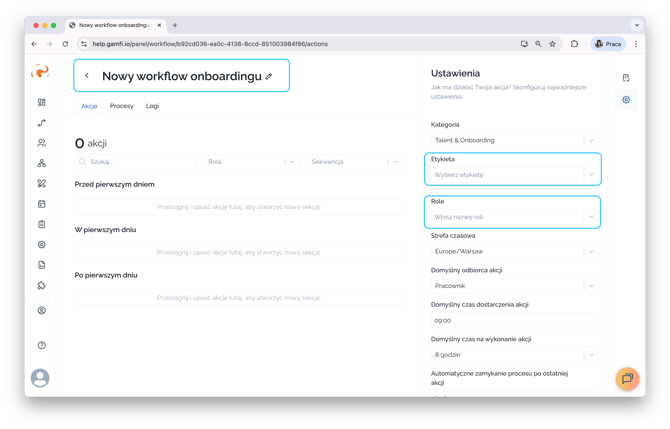
- Enter a friendly name for the new Workflow, such as "Onboarding of office workers" or "Remote onboarding",
- Select the appropriate category (learn more about categories 👉🏻 here),
- assign labels,
- indicate the roles to appear in the path (you can read more about adding custom Roles 👉🏻 here).
You can edit all these settings at a later stage in the 👉🏻 Workflow Settings section.
Great! Now you can move on to adding and configuring Actions in your Process (Workflow) template. We write about how to do it 👉🏻 here.
Workflow Settings
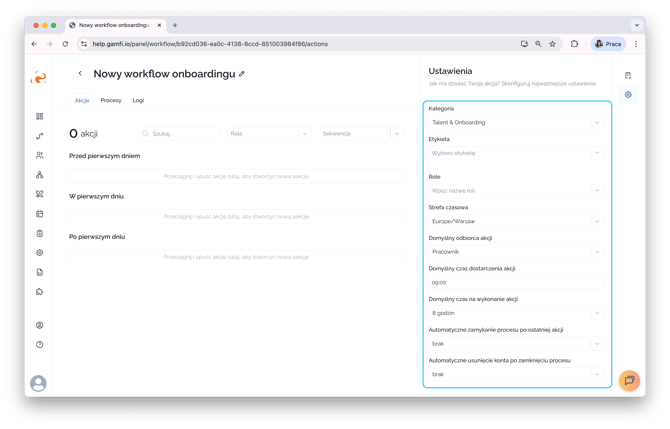
In the view of each Workflow in the bar on the right side of the screen under the cogwheel icon, you will find settings that you can modify at any time.
- Name - by this name you will identify the corresponding path in the Workflow list or when starting a Process. Remember that users see this name in their Portal;
- Category - specify the category of your Workflow to adjust content and messages to specific types of Processes;
- Labels - additional tags with which you can label Workflow;
- Roles - roles that participate in the Processes launched based on this Workflow. Adding a Role to a Workflow results in its display in the list of contacts in the Employee Portal;
- Default Action Recipient - select the Role in the Process that will be automatically assigned to the Action when it is dragged into Workflow (you can always change this!);
- Default Action delivery time - select the time that will be automatically assigned to the Action when it is dragged into Workflow (you can always change this!);
- Default time to execute an Action - select the required task or training completion date that will be automatically assigned to the Action when it is dragged into Workflow (you can always change this!);
- Automatic process closure after the last action - you can specify the time after which the process should transition to "Completed" status;
- Automatic account deletion after process closure - you can specify the time after which the employee's account should be anonymized after the process closure.
⚠️ Remember that the preparation of Workflow is necessary to start the Process.
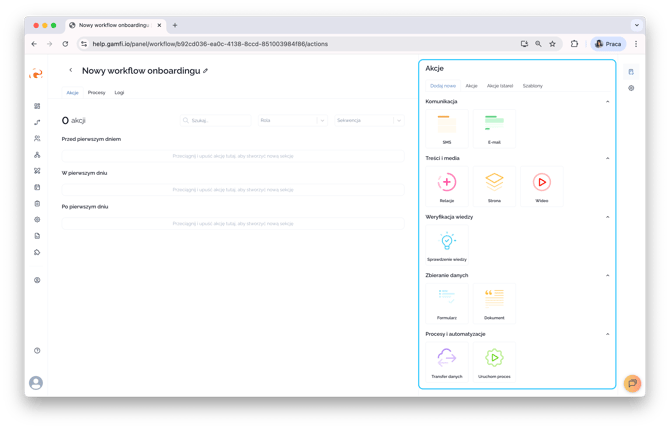
Workflow Builder
To add an Action to a Workflow you must select an existing Workflow or create a new Workflow.
You will be redirected to the Workflow Builder - the place where you define the entire Processes template.
Actions are added to Workflow using drag&drop mechanism.
 To add a new Action to Workflow, drag the selected tile (e.g., SMS or Email) from the right section (Actions) to the Workflow workspace. Click and hold the tile, then drop it in the location of your choice.
The action will automatically add to the Workflow with the status "Draft". Read more about it 👉🏻 here.
When building Workflow, you can use 4 options to add Actions (switch tabs in the "Actions" section to see their contents):
Building a Workflow can be done in several ways:
- Add new - the first option allows you to build new Actions from scratch. Drag the "SMS" or "Email" tile to the Workflow workspace and go to edit the Action. Use this option if you want to create an Action from scratch.
- My Actions - in this section you will find all previously published Actions in your Gamfi People Platform. Use this option if you want to use a previously added Action (e.g. in another Workflow). Remember, however, that editing such an Action (changing the content) is global, which means that the content of the Action will change in any Workflow to which the Action has been added.
- My templates - in this section you will find Action templates that were created based on previously prepared and saved Actions. This option allows you to create Actions based on saved templates, which makes creating Workflow faster and easier.
➡️ “Learning & Development” CATEGORY
- Go to the “Workflows” tab,
- click the “Create a new Workflow” button in the upper right corner of the screen, and then select the workflow category:
- Enter a friendly name for the new workflow, e.g., "First Aid Training";
- add cover and background graphics;
- Add the benefits of this training;
- Add to promoted - thanks to this, the training will appear on the user's desktop immediately after logging in to Gamfi.
☝🏻 You can always complete the Workflow settings after creating it.

WORKFLOW STATUS
If you're creating a new workflow and don't want it to appear in the selection list when launching an Employee Process, remember to leave "Status" disabled: